Hello friends!
Bobbie Sue here, again!
I'm excited to spend another Thursday with you as we design our own mailable Postcards using our favorite Unity Stamps! I know you are going to be just as excited about this challenge as I am!
This idea came to me after I had purchased the Vintage Postcard background stamp. I was so happy to have discovered that it works perfectly as an actual postcard. The stamped image measures 3.25" x 5". I encourage you to get this awesome stamp, or add it to your wish list! Although, I am going to show you how you can make your own postcard backing with other Unity stamps!


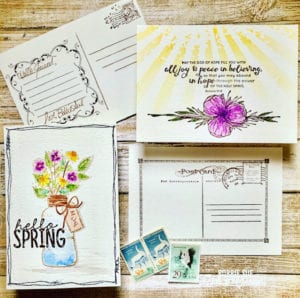
I absolutely love this vase of flowers and the Hello Spring sentiment from the 3/19 KOM called "Gather Love". Don't they pair perfectly together!?
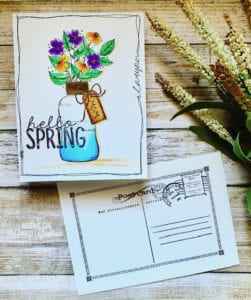
Here are details on how I created this postcard front.
(Use a heavy cardstock or watercolor paper to avoid it being too light, and getting lost in the mail.)
- First, I cut a piece of Bristol Smooth paper to my desired postcard size of 4.25×6.
- Next, I stamped the sentiment with VersaFine Clair in Pinecone . (I stamped the sentiment again so that I could have a fussy cut outline of it.)
- I lined the vase stamp over the covered sentiment and stamped it in the same color ink.
- After the ink dried, I colored the vase and flowers with Zig Clean Color Real Brush Pens.
- Lastly, I hand drew the frame and the words I love you and MOM.
**********************************
This postcard below has a simple, but unique backing. It allows plenty of room for the recipients address, as well as, a sweet note! I used a ruler to draw the line that divides, and the line for the recipients address. Take note that I did go too low with my personal message as it will end up being covered up by the bar code sticker the P.O. will put on it. They suggested leaving at least 3/4 inch on the bottom of the postcard. Lesson learned! ;)
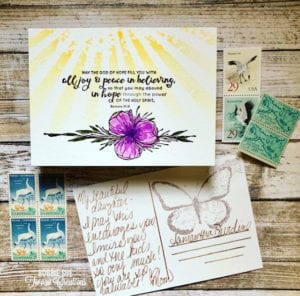
The butterfly stamp is from the 3/17 Layers of Life (LOL) called "love who you are". I love the faux looking postage stamp that is attached to the butterfly image.
For the sunrays on the front of this postcard I used a Tim Holtz stencil called Rays. I love what it adds to this scripture that speaks of peace. With my TH stencil brush I applied Distress ink pad colors in Wild Honey and Mustard Seed. This beautiful sentiment is from a Graciellie Design set called "He Will Sustain You". The gorgeous flower is also a Graciellie Design from the set "You Matter".
Here are the steps I took to create the postcard backs.
If not using the Vintage Postcard stamp:
- Using a ruler as a guide draw a line in the very center of your postcard.
- To the left of the center line, draw the 4 lines for your recipients address.
- To the right of the center line, draw the lines for your personal message. (optional)
- Stamp your faux postage stamp in the left upper corner.
- If you have no postage-stamp stamps, be creative!
You can also find faux postage stamp images in "Hello Dear", "Enjoy the Ride", "Vintage Era Background Kit", and "Vintage Christmas Kit". There may be some others that I am unaware of so if you come across more I'd love to know!
Below you can see another design I created for the back. Again, allowing plenty of room for the address, and a sweet note! The frame is from a set called Love in Return. With a ruler as my guide, I added the lines inside the frame for the message. The vintage looking faux stamp is from the beautiful 1/19 LOL set called "envelope of love".
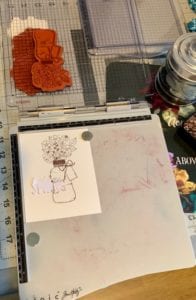
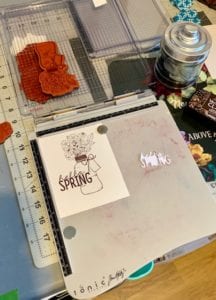
No, your eyes do not deceive you. Ha! The Hello Spring card in this photo is different than the one posted above. I wasn't entirely happy with my coloring on this one so I made another! And I am so happy I did.
Friends, I encourage you to mail your postcard to someone. A hug in the mail is always a day brightener! I'd love to know who you sent yours to!
I did go to my local post office to verify all the information needed to properly mail your postcard. The cost to mail a postcard is $.35 . They do sell postcard stamps, but the only design available nation wide is a coral reef design. The measurements needed for the postcard, to follow the USPS guidelines, are as follows:
(1) It must measure at least 3.5 x 5 in.
(2) It must be in the shape of a rectangle.
(3) It can not measure greater than 4.25 x 6in.
(4) It can not be any thicker than .016 in.
(5) It can not be any thinner .007 in.
(6) Leave a 3/4 in blank space under your personal message and recipients address.
I also asked about layers on a postcard. It must be one dimensional. You can have one layer on top of another, but it has to cover it completely and be adhered entirely.
I am eager to see the amazing designs you will come up with for your own Postcards! Keep in mind, this challenge is for a week only!! (Also remember, the Napkin Challenge lasts the entire month of April!)
I understand not everyone will have the stamps mentioned to use in the design of your postcard backing, but everyone has a stamp they could use to design the front!
If you have any questions regarding this challenge, please know, you are always welcome to reach out to me!
You can also find me on the Unity Blog today! Visit me here!
Unity is making your participation even more rewarding by offering a prize for each challenge! Each week you have a chance to win some fantastic Unity stamps!
Have fun creating!
I invite you to join me again next Thursday as we use our favorite stamps to create something that is sure to make anyone smile!
Until then, friends~
Be blessed!
Bobbie Sue


Awesome challenge!! Thinking, thinking!!!
ReplyDeleteI’m so excited to see what yours will look like!!
DeleteThis is such a fun challenge! Time to think of what to do... 🤔
ReplyDeleteI’m so happy your going to join this challenge!! 👏👏👏 I love this one!!
DeleteBeautiful ideas! Love them, Bobbie Sue
ReplyDelete